
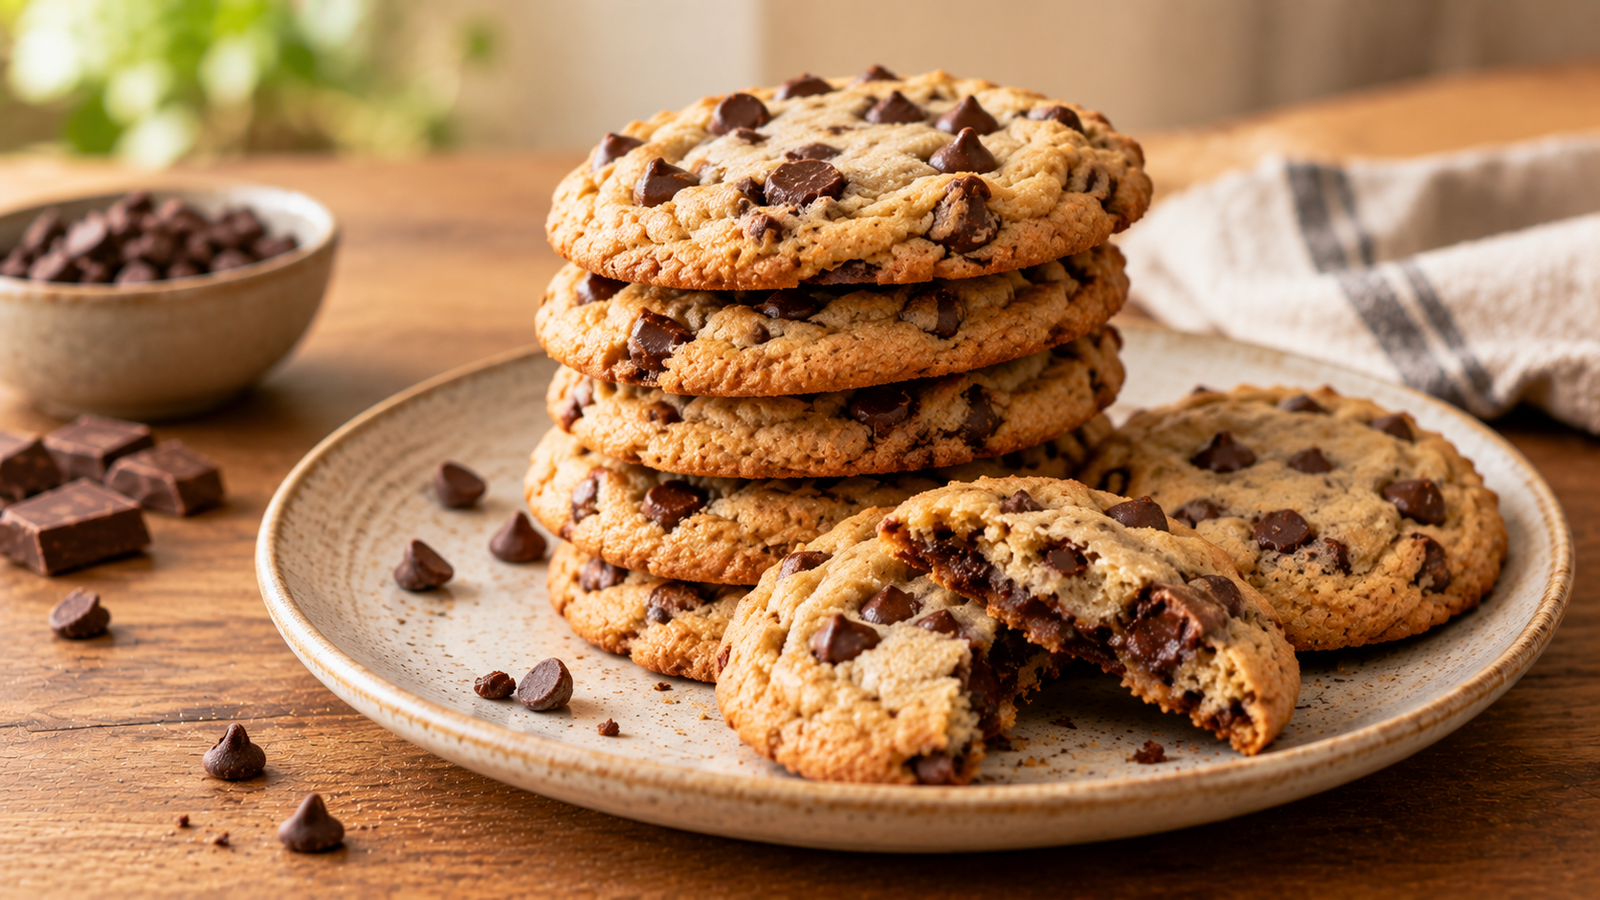
Classic Chocolate Chip Cookies (Soft, Chewy, and Crisp-Edged)
These cookies have everything a classic chocolate chip cookie should: golden, slightly crisp edges, a soft and chewy center, and pockets of melted chocolate throughout. The brown sugar in the dough keeps the center tender, while the edges bake up with just enough crispness to give each bite some contrast.
The chocolate flavor comes through clearly, especially when the cookies are eaten warm and the chips are still soft. Using a mix of butter and both brown and granulated sugar gives the dough the right balance of chew and structure without making the cookies cakey.
This recipe is easy to make with basic pantry ingredients and no special equipment. The dough comes together in one bowl using either a hand mixer or a sturdy whisk, which makes it approachable for beginner bakers.
These cookies are good for everyday snacking, lunchboxes, casual get-togethers, or whenever a warm, homemade cookie is what’s needed.
Quick Recipe Overview
- Prep Time: 15 minutes
- Chill Time: 30 minutes (recommended)
- Bake Time: 10–12 minutes
- Total Time: About 1 hour
- Servings: 24 cookies
- Yield: 24 cookies (about 2 tablespoons of dough each)
- Category: Dessert & Baking – Cookies
- Cuisine: American
- Difficulty Level: Beginner
Ingredients
- 2 1/4 cups (280 g) all-purpose flour
- 1 teaspoon baking soda
- 1/2 teaspoon salt
- 1 cup (226 g) unsalted butter, softened
- 3/4 cup (150 g) granulated sugar
- 3/4 cup (165 g) packed brown sugar
- 2 large eggs, room temperature
- 2 teaspoons vanilla extract
- 2 cups (340 g) semi-sweet chocolate chips
Equipment
- Mixing bowls
- Whisk
- Electric hand mixer or stand mixer (optional but helpful)
- Measuring cups and spoons
- Baking sheets
- Parchment paper
- Cookie scoop or tablespoon
- Cooling rack
- Oven
Step-by-Step Instructions
Prepare the dry ingredients:
- In a medium bowl, whisk together the flour, baking soda, and salt. Set aside.
Cream the butter and sugars:
2. In a large bowl, beat the softened butter, granulated sugar, and brown sugar together on medium speed for about 2–3 minutes, until light and fluffy. The mixture should look pale and slightly airy, not just combined.
Add eggs and vanilla:
3. Add the eggs one at a time, beating well after each addition. Mix in the vanilla extract until fully incorporated.
Combine wet and dry ingredients:
4. Add the flour mixture to the butter mixture in two additions, mixing on low speed or stirring by hand just until the flour disappears. The dough should look thick and slightly soft, not runny.
Add chocolate chips:
5. Fold in the chocolate chips with a spatula or wooden spoon until evenly distributed throughout the dough.
Chill the dough:
6. Cover the bowl and refrigerate the dough for at least 30 minutes. This firms up the butter and helps the cookies hold their shape and bake up thicker rather than spreading too thin. Chilling for up to 24 hours can deepen the flavor further.
Portion the cookies:
7. Preheat the oven to 350°F (175°C). Using a cookie scoop or tablespoon, portion the dough into balls of about 2 tablespoons each.
Prepare the baking sheet:
8. Line baking sheets with parchment paper. Place the dough balls about 2 inches apart to allow room for spreading.
Bake:
9. Bake for 10–12 minutes, until the edges are golden brown and the centers still look slightly soft and underbaked. The cookies will continue to set as they cool, so avoid waiting for the centers to look fully firm in the oven.
Cool:
10. Let the cookies rest on the baking sheet for 5 minutes before transferring them to a cooling rack to finish cooling completely.
How to Get Soft and Chewy Cookies
- Butter temperature: Butter that is properly softened (not melted or too cold) creams with the sugar to trap air, which supports a chewy texture rather than a greasy, flat cookie.
- Brown sugar: Brown sugar holds more moisture than granulated sugar, which is a major factor in keeping the center soft and chewy.
- Flour measurement: Too much flour makes cookies dry and cakey. Spoon the flour into the measuring cup and level it off rather than scooping directly from the bag.
- Dough chilling: Chilling firms the butter, which slows spreading in the oven and helps create a thicker, chewier cookie instead of a thin, crisp one.
- Baking time: Pulling the cookies while the centers still look slightly underdone preserves a soft, chewy texture, since they continue cooking on the hot pan after leaving the oven.
- Oven temperature: An oven that runs too hot can overbake the edges before the center sets properly. An oven thermometer helps confirm accuracy.
- Cooling: Letting the cookies finish setting on the baking sheet before moving them prevents breakage and allows the residual heat to complete the bake gently.
Baking Tips
- Measure flour correctly: Spoon and level rather than scoop, to avoid adding excess flour that dries out the dough.
- Avoid overmixing: Once the flour is added, mix only until it’s incorporated. Overmixing develops gluten and can make cookies tougher.
- Keep cookie sizes consistent: Using a cookie scoop keeps cookies uniform in size, which helps them bake evenly and finish at the same time.
- Space cookies properly: Leave about 2 inches between dough balls, since the cookies will spread as they bake.
- Avoid overbaking: Remove cookies while the centers still look slightly soft; they firm up as they cool on the pan.
- Rotate the pan if needed: If your oven bakes unevenly, rotate the baking sheet halfway through for more even color.
- Cool before storing: Let cookies cool completely before storing them airtight, so trapped steam doesn’t make them soggy.
Common Mistakes
- Cookies spread too much: Usually caused by butter that’s too soft or melted, or dough that wasn’t chilled. Make sure to chill the dough for at least 30 minutes.
- Cookies don’t spread at all: This can happen if too much flour was added or the dough was chilled for too long without coming slightly toward room temperature before baking.
- Cookies are too dry: Often the result of too much flour or overbaking. Measure carefully and pull the cookies while centers still look soft.
- Cookies are too cakey: This can result from overmixing the dough or using too much flour relative to the fat and sugar.
- Cookies burn on the edges: This usually means the oven is running hot, or the cookies were left in too long. Check a minute or two before the recommended time.
- Cookies remain raw in the center: This can happen if cookies are too thick or too large, or if the oven temperature is too low. Confirm your oven temperature with a thermometer.
- Cookies become hard after cooling: This is typically caused by overbaking or storing the cookies without an airtight container, which lets them dry out.
Variations
- Dark chocolate chip cookies: Replace the semi-sweet chips with dark or bittersweet chocolate chips for a less sweet, more intense chocolate flavor.
- Chocolate chunk cookies: Use roughly chopped chocolate bars instead of chips for larger, more irregular pockets of melted chocolate.
- Walnut chocolate chip cookies: Fold in 1/2 cup chopped walnuts along with the chocolate chips for added crunch.
- Sea salt chocolate chip cookies: Sprinkle a small pinch of flaky sea salt on top of each dough ball just before baking.
- White chocolate chip cookies: Substitute white chocolate chips for semi-sweet chips for a sweeter, creamier flavor.
- Peanut butter chocolate chip cookies: Replace 1/4 cup of the butter with creamy peanut butter for a subtle peanut flavor alongside the chocolate.
Storage Instructions
- Room temperature: Store baked cookies in an airtight container at room temperature for up to 5 days.
- Recommended container: A container with a tight-fitting lid helps keep cookies soft; adding a slice of bread to the container can help retain moisture.
- Refrigerating dough: Cookie dough can be covered and refrigerated for up to 3 days before baking.
- Freezing dough: Portion the dough into balls, freeze on a baking sheet until solid, then transfer to a freezer bag for up to 3 months.
- Freezing baked cookies: Cool completely, then store in a freezer-safe container with parchment between layers for up to 3 months.
- Refreshing stored cookies: Warm cookies for about 10 seconds in the microwave to soften them and refresh the melted-chocolate texture.
Make-Ahead Instructions
- Refrigerating dough: Prepare the dough as directed, cover tightly, and refrigerate for up to 3 days. Let it sit at room temperature for about 10 minutes before scooping if it’s very firm.
- Freezing dough portions: Scoop the dough into balls, freeze until solid on a tray, then store in a labeled freezer bag for up to 3 months.
- Baking frozen dough: Bake frozen dough balls directly from the freezer; no need to thaw first.
- Adjusting baking time: Add about 1–2 minutes to the baking time when baking frozen dough, checking for the same golden-edge, soft-center cues.
Serving Suggestions
Serve these cookies with a cold glass of milk, or alongside coffee or tea for an afternoon treat. They also pair well with a scoop of vanilla ice cream for a simple cookie sandwich or sundae topping. Warming a cookie for a few seconds before serving softens the chocolate chips and enhances the texture.
Frequently Asked Questions
Can I use salted butter?
Yes. If using salted butter, you can reduce the added salt to about 1/4 teaspoon to balance the overall flavor.
Do I need to chill the dough?
Chilling is recommended for at least 30 minutes, since it helps control spreading and results in a thicker, chewier cookie. Skipping it will still produce cookies, but they may spread more and bake thinner.
Why did my cookies spread too much?
This is usually caused by butter that was too soft or melted, or skipping the chilling step. Make sure the butter is softened, not melted, and chill the dough before baking.
Why are my cookies hard?
Hard cookies are typically the result of overbaking or too much flour. Pull the cookies while the centers still look slightly soft and measure flour by spooning and leveling.
Can I freeze cookie dough?
Yes. Portion the dough into balls, freeze until solid, then store in a freezer bag for up to 3 months. Bake directly from frozen, adding 1–2 minutes to the bake time.
Can I use chocolate chunks instead of chips?
Yes. Chopped chocolate bars work well and create larger pockets of melted chocolate with slightly more irregular texture.
How do I make thicker cookies?
Chilling the dough longer (up to 24 hours) and making sure the butter isn’t overly soft both help the cookies hold their shape and bake up thicker.
How do I know when cookies are done?
The edges should look golden brown while the centers still appear slightly soft and underbaked. The cookies will finish setting as they cool on the baking sheet.
Nutrition Information (Estimated, Per Cookie)
- Calories: 180
- Carbohydrates: 23 g
- Protein: 2 g
- Fat: 9 g
- Saturated Fat: 5 g
- Fiber: 1 g
- Sugar: 15 g
- Sodium: 95 mg
Nutrition information is an estimate and may vary depending on the ingredients, cookie size, and serving size.
Recipe Card
Classic Chocolate Chip Cookies
Description: Classic homemade chocolate chip cookies with golden, crisp edges, soft chewy centers, and plenty of melted chocolate in every bite.
Prep Time: 15 minutes
Chill Time: 30 minutes
Bake Time: 10–12 minutes
Total Time: About 1 hour
Yield: 24 cookies
Ingredients
- 2 1/4 cups (280 g) all-purpose flour
- 1 teaspoon baking soda
- 1/2 teaspoon salt
- 1 cup (226 g) unsalted butter, softened
- 3/4 cup (150 g) granulated sugar
- 3/4 cup (165 g) packed brown sugar
- 2 large eggs, room temperature
- 2 teaspoons vanilla extract
- 2 cups (340 g) semi-sweet chocolate chips
Instructions
- Whisk together flour, baking soda, and salt; set aside.
- Cream butter, granulated sugar, and brown sugar until light and fluffy, about 2–3 minutes.
- Beat in eggs one at a time, then the vanilla extract.
- Mix in the flour mixture just until combined.
- Fold in the chocolate chips.
- Chill the dough at least 30 minutes.
- Preheat oven to 350°F (175°C). Scoop dough into 2-tablespoon balls, spaced 2 inches apart on parchment-lined baking sheets.
- Bake 10–12 minutes, until edges are golden and centers look slightly soft.
- Cool on the baking sheet 5 minutes, then transfer to a rack to cool completely.
Notes
- Chilling the dough is key to preventing excess spreading — don’t skip it if you want thicker cookies.
- Pull the cookies while the centers still look underbaked; they’ll finish setting as they cool.
- Spoon and level the flour rather than scooping to avoid dry, cakey cookies.
- Store baked cookies airtight at room temperature for up to 5 days.
- Dough can be frozen in portions and baked straight from frozen, adding 1–2 minutes to the bake time.