
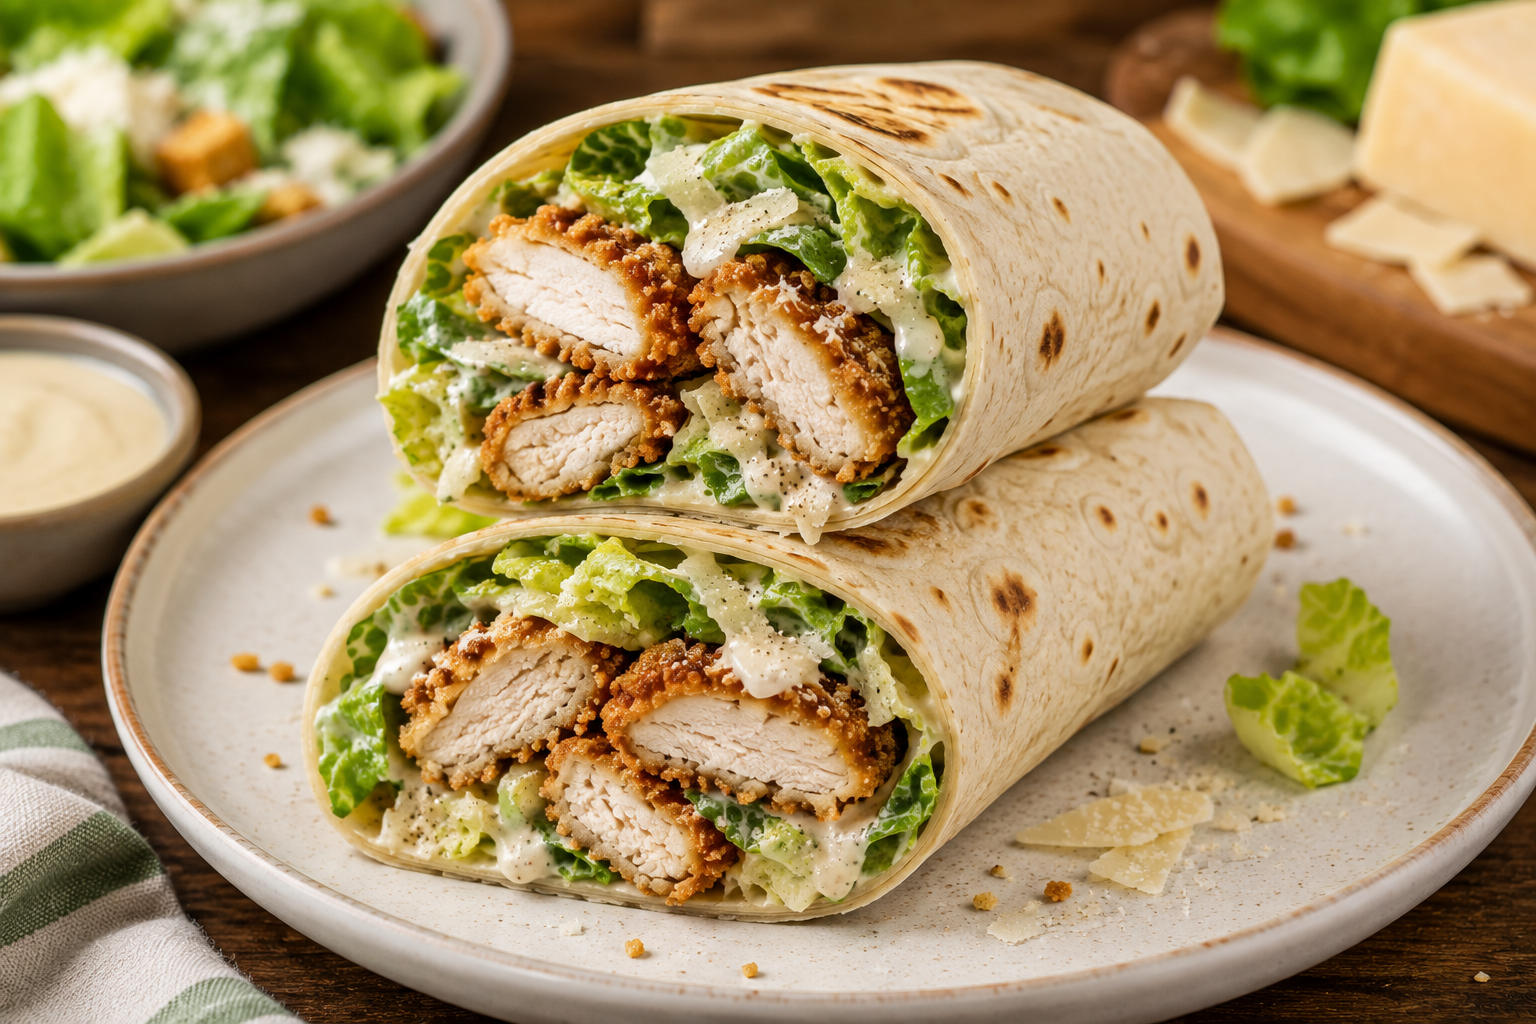
Crispy Chicken Caesar Wrap
A crispy chicken Caesar wrap takes everything satisfying about a Caesar salad and turns it into something you can eat with one hand. Golden, crunchy chicken strips are tucked into a soft tortilla alongside crisp romaine, shaved Parmesan, and a creamy Caesar dressing that ties the whole thing together. It’s the kind of easy lunch recipe that feels a little more special than a regular sandwich, without asking for much extra time in the kitchen.
The crispiness comes from a simple breaded coating that gets pan-fried until it’s deeply golden on the outside, while the chicken underneath stays juicy. That contrast in texture is what makes this chicken wrap so satisfying — the crunch of the coating and fresh lettuce against the smooth, tangy dressing. Warming the tortilla before assembly also matters more than it might seem, since it keeps the wrap flexible and prevents cracking when it’s rolled.
This Caesar wrap works just as well for a quick lunch on a busy day as it does for meal prepping ahead of the week. The components can be made in stages, which means you can have crispy chicken ready to go and simply build the wrap when you’re ready to eat. It’s a reliable recipe to keep in rotation whenever you want something quick, filling, and genuinely tasty.
Why You’ll Love These Crispy Chicken Caesar Wraps
- The chicken coating turns genuinely crispy in a regular skillet, with no deep fryer required.
- It’s a complete meal in one wrap, combining protein, greens, and a flavorful dressing.
- The components can be prepped ahead, making assembly quick on a busy day.
- It’s easy to customize with different proteins, spice levels, or add-ins.
- The recipe uses everyday ingredients that are simple to find.
- It travels well, making it a solid option for packed lunches.
Ingredients
For the Crispy Chicken
- 1 pound (450 g) boneless, skinless chicken breasts, sliced into thin strips
- 1/2 teaspoon salt
- 1/4 teaspoon black pepper
- 1/2 cup (65 g) all-purpose flour
- 1 large egg
- 2 tablespoons milk
- 1 cup (100 g) panko breadcrumbs
- 1/2 teaspoon garlic powder
- 1/2 teaspoon paprika
- 1/4 cup (60 ml) neutral oil, such as vegetable or canola, for pan-frying
For the Caesar Salad Filling
- 1/2 cup (120 g) mayonnaise
- 1 tablespoon fresh lemon juice
- 1 teaspoon Dijon mustard
- 1 teaspoon Worcestershire sauce
- 1 small garlic clove, minced or grated
- 1/4 cup (25 g) finely grated Parmesan cheese, plus extra for topping
- Salt and black pepper, to taste
- 4 cups (about 1 small head) romaine lettuce, chopped
- 1/4 cup (25 g) shaved or shredded Parmesan, for the filling
For the Wraps
- 4 large flour tortillas (10-inch or 25 cm)
- Extra shaved Parmesan, for topping, optional
Equipment
- Three shallow bowls or plates, for breading the chicken
- Large skillet
- Tongs
- Cutting board and sharp knife
- Mixing bowl, for the dressing
- Whisk
- Paper towels or a wire rack, for draining the chicken
How to Make Crispy Chicken Caesar Wraps
1. Prepare the chicken. Pat the chicken strips dry with a paper towel, then season them with salt and pepper. Drying the chicken first helps the coating stick better and cook up crisper.
2. Create the crispy coating. Set up a breading station using three shallow bowls. Place the flour in the first bowl. In the second bowl, whisk the egg and milk together until combined. In the third bowl, mix the panko breadcrumbs with garlic powder and paprika. Dip each chicken strip first into the flour, shaking off any excess, then into the egg mixture, and finally press it into the panko mixture so the coating sticks evenly on all sides.
3. Cook the chicken until golden and fully cooked. Heat the oil in a large skillet over medium heat. Once the oil is shimmering, add the breaded chicken strips in a single layer, being careful not to overcrowd the pan. Cook for 3–4 minutes per side, until deeply golden brown and cooked through to an internal temperature of 165°F (74°C). Transfer the cooked strips to a wire rack or paper towel-lined plate to drain any excess oil, which helps keep the coating crisp.
4. Prepare the Caesar dressing. In a mixing bowl, whisk together the mayonnaise, lemon juice, Dijon mustard, Worcestershire sauce, minced garlic, and grated Parmesan until smooth. Season with salt and pepper to taste. Adjust the lemon juice or Worcestershire sauce slightly if you prefer a tangier dressing.
5. Prepare the lettuce and Parmesan. Chop the romaine lettuce into bite-sized pieces and pat it dry if it was recently washed, since excess moisture can make the wrap soggy. Have the shaved or shredded Parmesan ready alongside it.
6. Combine the Caesar filling. In a large bowl, toss the chopped romaine with about two-thirds of the Caesar dressing and the Parmesan, mixing until the lettuce is evenly coated. Taste and add more dressing if needed, keeping in mind you’ll also be adding some directly to the wrap.
7. Warm the tortillas. Warm each tortilla for about 20–30 seconds per side in a dry skillet over medium heat, or wrap them in a damp paper towel and microwave for about 15–20 seconds. Warming makes the tortillas pliable and much less likely to crack when folded.
8. Assemble the wraps. Lay a warm tortilla flat and spread a thin layer of the remaining Caesar dressing across the center. Add a portion of the dressed romaine mixture, followed by several pieces of the crispy chicken. Top with a little extra shaved Parmesan if desired.
9. Fold and serve. Fold in the sides of the tortilla, then roll it tightly from the bottom up, tucking the filling in as you go. Slice each wrap in half on a diagonal and serve right away while the chicken is still warm and crisp.
Tips for the Best Chicken Caesar Wraps
- Slice the chicken into even strips so each piece cooks through at the same rate.
- Press the panko firmly onto the chicken so the coating doesn’t fall off during cooking.
- Let the oil fully heat before adding the chicken, since a cool pan leads to a greasy, less crispy coating.
- Drain the cooked chicken on a wire rack rather than stacking it on a plate, which helps steam escape instead of softening the crust.
- Keep the lettuce and dressing separate from the wrap assembly until you’re ready to eat, especially if you’re prepping ahead.
- Don’t overfill the tortilla, since too much filling makes it difficult to fold and more likely to tear.
- Warm the tortilla before rolling; a cold tortilla is much more likely to crack along the fold.
- If packing for later, add the crispy chicken to the wrap just before eating so it doesn’t lose its crunch sitting in the fridge.
Common Mistakes to Avoid
- Skipping the flour step. Going straight to the egg and breadcrumbs without the flour layer first often results in the coating sliding off during cooking. The flour helps everything adhere properly.
- Overcrowding the pan. Adding too many chicken strips at once lowers the oil temperature and leads to soggy, unevenly cooked coating instead of a crisp one.
- Using wet lettuce. Lettuce that hasn’t been dried well after washing releases extra moisture into the wrap, making the tortilla soggy faster.
- Assembling the wrap too far in advance. Caesar wraps are best assembled close to serving time. Sitting for too long with the dressing already on causes the tortilla and coating to soften.
- Not warming the tortilla. Cold tortillas crack easily when folded, which makes the wrap harder to eat and less visually appealing.
Ingredient Substitutions
- Chicken: Chicken thighs can be used instead of chicken breasts, cut into strips in the same way. Cooking time may need a minute or two longer depending on thickness.
- Tortillas: Whole wheat or spinach tortillas both work well in place of regular flour tortillas.
- Parmesan: Pecorino Romano makes a good substitute, offering a similarly sharp, salty flavor.
- Caesar dressing: A good-quality store-bought Caesar dressing can be used in place of the homemade version if you’re short on time.
- Lettuce: Chopped kale or a romaine and spinach blend can replace romaine lettuce for a different texture and flavor.
- Breadcrumbs: Regular breadcrumbs can replace panko, though the coating will be slightly less crunchy and more fine in texture.
Variations
Spicy Chicken Caesar Wrap
Add a pinch of cayenne pepper or a few dashes of hot sauce to the breadcrumb mixture, and stir a small amount of hot sauce into the Caesar dressing for a spicier version of the wrap.
Grilled Chicken Caesar Wrap
Skip the breading altogether and season the chicken strips with salt, pepper, and a little olive oil, then grill or pan-sear them until fully cooked. This gives a lighter version of the wrap with a smoky flavor instead of a crispy coating.
Bacon Chicken Caesar Wrap
Cook a few strips of bacon until crisp, then crumble them into the Caesar filling along with the lettuce and Parmesan for extra flavor and crunch.
Vegetarian Caesar Wrap
Replace the chicken with crispy breaded tofu strips or roasted chickpeas, prepared using the same breading and pan-frying method, for a vegetarian take on the same wrap.
How to Store Leftovers
For the best texture, store the components separately rather than assembling the full wraps ahead of time. Keep the cooked chicken in an airtight container in the refrigerator for up to 3 days. Store the dressed lettuce separately, since dressing left on the lettuce for too long will cause it to wilt. Any undressed lettuce and shaved Parmesan can also be kept separately in the fridge for a couple of days. If wraps have already been assembled, they’re best eaten within a few hours, as the tortilla will soften over time.
How to Reheat
To bring the crispy coating back to life, reheat the chicken in a skillet over medium heat for 2–3 minutes per side, or in an oven or air fryer preheated to 375°F (190°C) for about 5–7 minutes, flipping halfway through. Avoid microwaving the chicken on its own, since it tends to soften the coating rather than keeping it crisp. Once the chicken is reheated, assemble the wrap fresh with cold lettuce and dressing for the best texture contrast.
Frequently Asked Questions
Can I use leftover chicken? Yes, though it won’t have the same crispy coating as freshly breaded chicken. Leftover rotisserie or grilled chicken can be sliced and warmed slightly before adding it to the wrap for a quicker option.
Can I make these wraps ahead of time? The individual components can be prepped ahead, including the dressing, breaded chicken, and washed lettuce. It’s best to assemble the wraps close to when you plan to eat them so the tortilla and coating stay in good texture.
How do I keep the wrap from getting soggy? Make sure the lettuce is thoroughly dried after washing, don’t overdress the filling, and assemble the wrap shortly before eating rather than letting it sit fully assembled for an extended period.
Can I use grilled chicken instead? Yes. Grilled chicken works well in this recipe if you prefer a lighter option without the breaded coating. Season and cook it as you normally would for grilled chicken, then slice it before adding to the wrap.
What type of tortilla works best? Large, soft flour tortillas around 10 inches in diameter hold the filling well without tearing. Whole wheat tortillas are a good alternative if you prefer a heartier option.
Can I make the Caesar dressing ahead of time? Yes. The dressing can be made up to 3 days in advance and stored in an airtight container in the refrigerator. Give it a good stir before using, since it may thicken slightly as it chills.
Can I bake the chicken instead of pan-frying it? Yes. Arrange the breaded chicken strips on a lined baking sheet, lightly spray or drizzle them with oil, and bake at 400°F (200°C) for about 15–18 minutes, flipping halfway through, until golden and cooked through.
Is this recipe good for meal prep? Yes, as long as the components are stored separately. Cooked chicken, dressing, and washed lettuce can all be prepped ahead, with the wraps assembled fresh each time you’re ready to eat.
Serving Suggestions
A crispy chicken Caesar wrap pairs well with something light and fresh on the side. Fresh fruit like grapes, apple slices, or a small citrus salad works nicely to balance out the richness of the dressing. Roasted potatoes or crispy potato wedges make a heartier side if you’re looking for something more filling. A simple green salad or a light vegetable soup also rounds out the meal well, especially for a lighter lunch spread.
Recipe Card
Recipe Name: Crispy Chicken Caesar Wrap
Prep Time: 20 minutes
Cook Time: 15 minutes
Total Time: 35 minutes
Servings: 4
Difficulty: Easy
Ingredients:
For the Crispy Chicken
- 1 pound (450 g) boneless, skinless chicken breasts, sliced into strips
- 1/2 teaspoon salt
- 1/4 teaspoon black pepper
- 1/2 cup (65 g) all-purpose flour
- 1 large egg
- 2 tablespoons milk
- 1 cup (100 g) panko breadcrumbs
- 1/2 teaspoon garlic powder
- 1/2 teaspoon paprika
- 1/4 cup (60 ml) neutral oil, for pan-frying
For the Caesar Salad Filling
- 1/2 cup (120 g) mayonnaise
- 1 tablespoon fresh lemon juice
- 1 teaspoon Dijon mustard
- 1 teaspoon Worcestershire sauce
- 1 small garlic clove, minced
- 1/4 cup (25 g) grated Parmesan, plus extra for topping
- Salt and black pepper, to taste
- 4 cups chopped romaine lettuce
- 1/4 cup (25 g) shaved Parmesan
For the Wraps
- 4 large flour tortillas (10-inch)
- Extra shaved Parmesan, optional
Instructions:
- Season chicken strips with salt and pepper, then bread using flour, egg wash, and seasoned panko.
- Pan-fry in hot oil, 3–4 minutes per side, until golden and cooked through; drain on a rack.
- Whisk together mayonnaise, lemon juice, Dijon, Worcestershire, garlic, and Parmesan for the dressing.
- Toss chopped romaine with most of the dressing and shaved Parmesan.
- Warm tortillas briefly in a skillet or microwave.
- Spread remaining dressing on each tortilla, then add the Caesar filling and crispy chicken.
- Fold in the sides, roll tightly, slice in half, and serve immediately.
Notes: Store cooked chicken, dressing, and undressed lettuce separately in airtight containers in the refrigerator for up to 3 days. Reheat chicken in a skillet or oven to keep it crisp, and assemble wraps fresh with cold lettuce and dressing.